Media images in the AcadeMap Document Builder can be backgrounds, seals, icons, clipart, or any other design element you find useful on your document.
(Click images to enlarge)
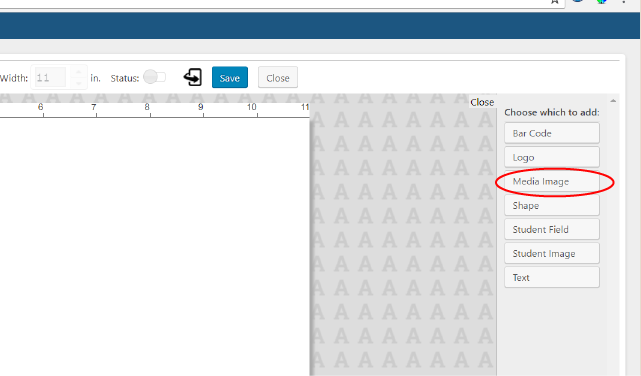
Click ‘Add Element’ and then click ‘Media Image’.
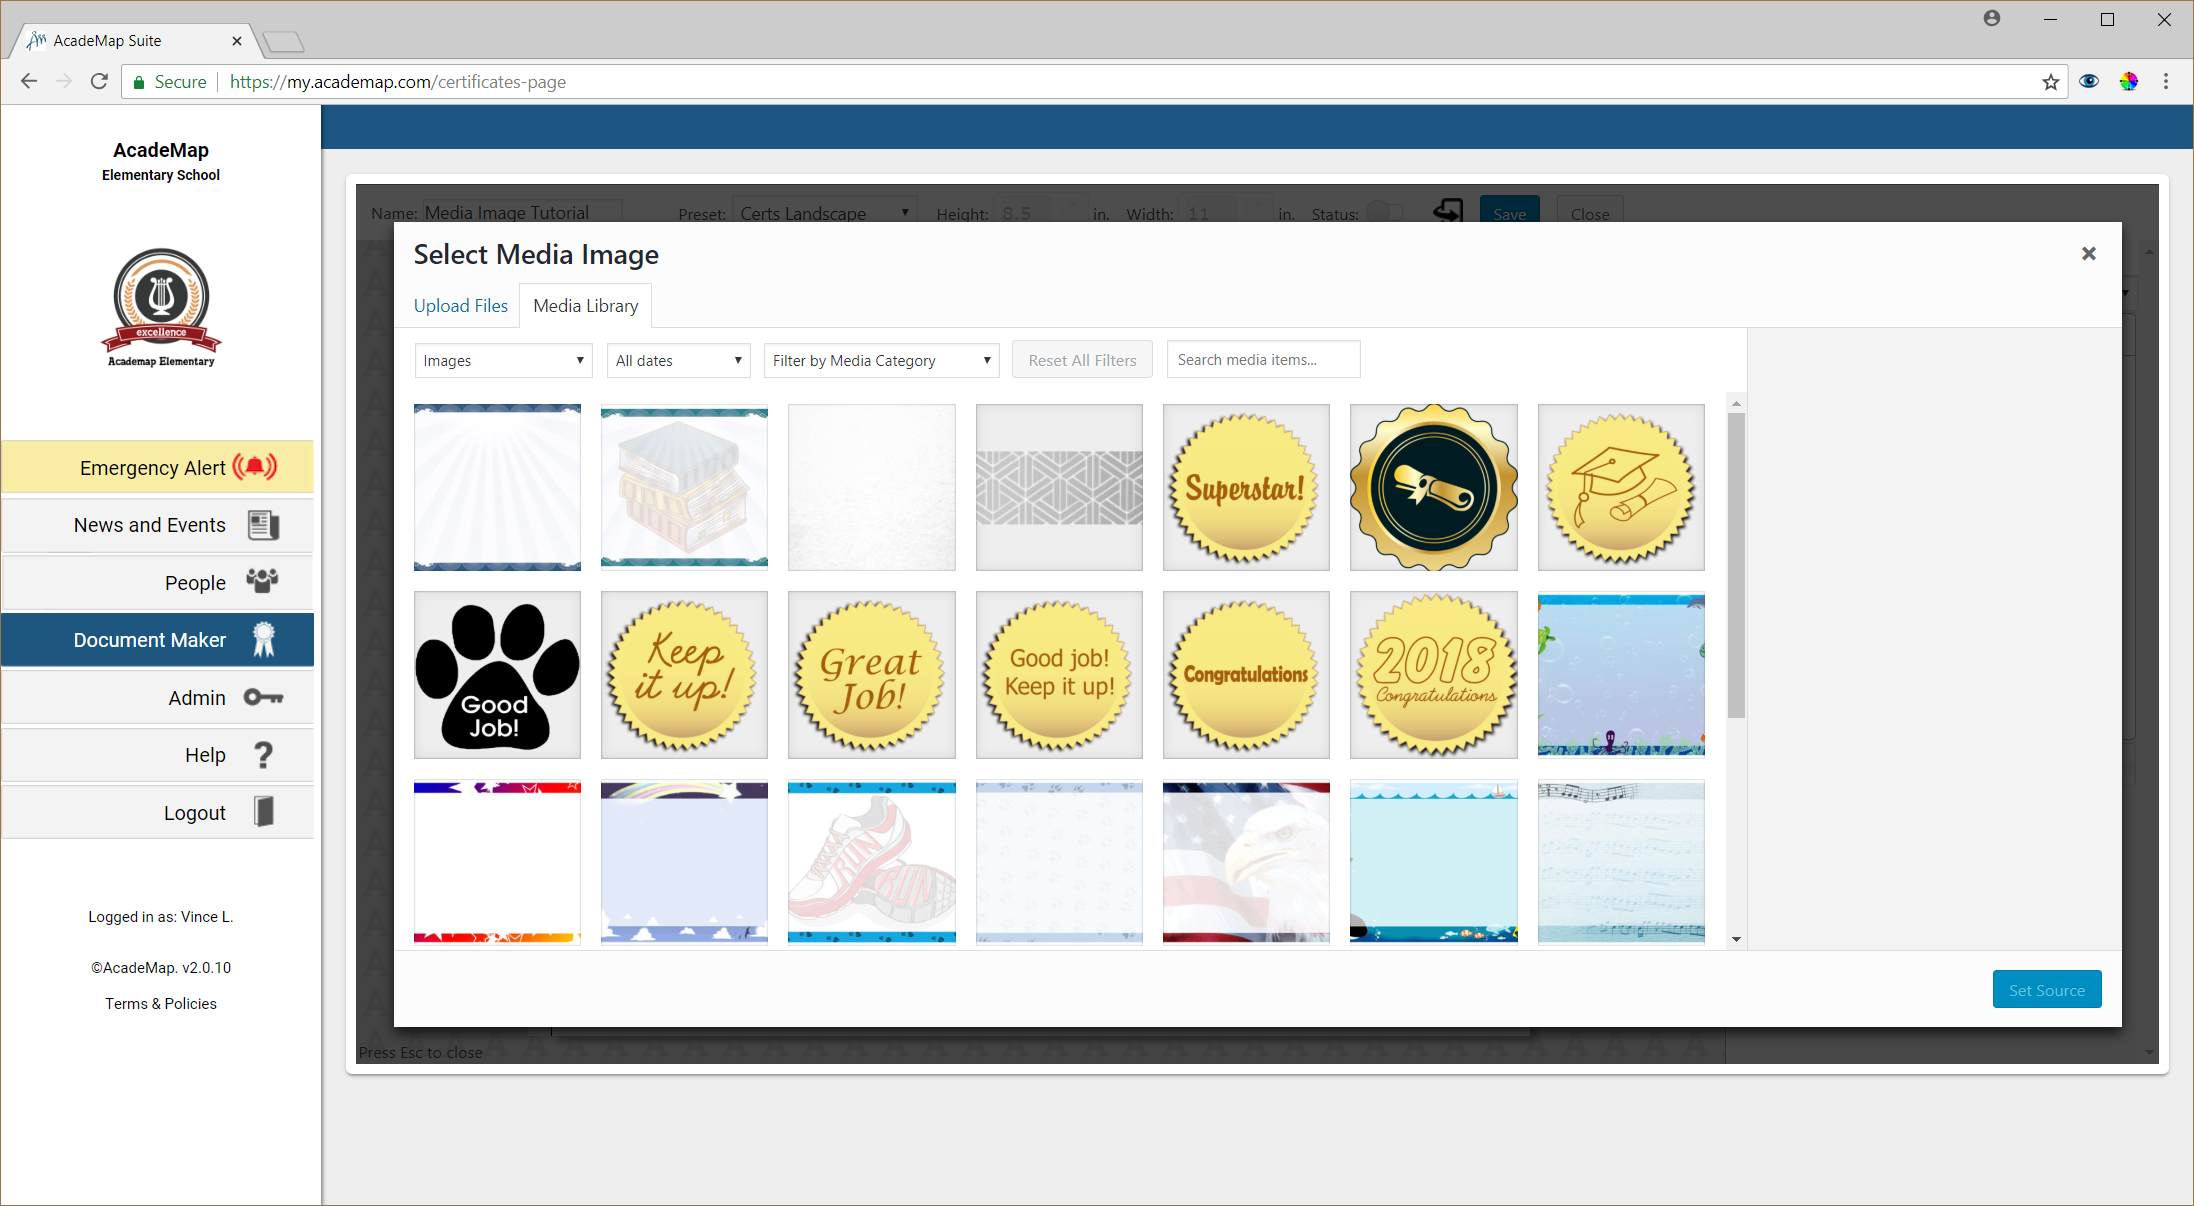
You will be prompted to select an image from the gallery of uploaded content. You can either select one of the available images already in your gallery (uploaded either by you or by your school photographer) or you can add a new image.
To add a new image, click ‘Upload Image’.
To select an existing image, scroll through the gallery to select the image you want, and then click ‘Set Source’ on the bottom right corner.
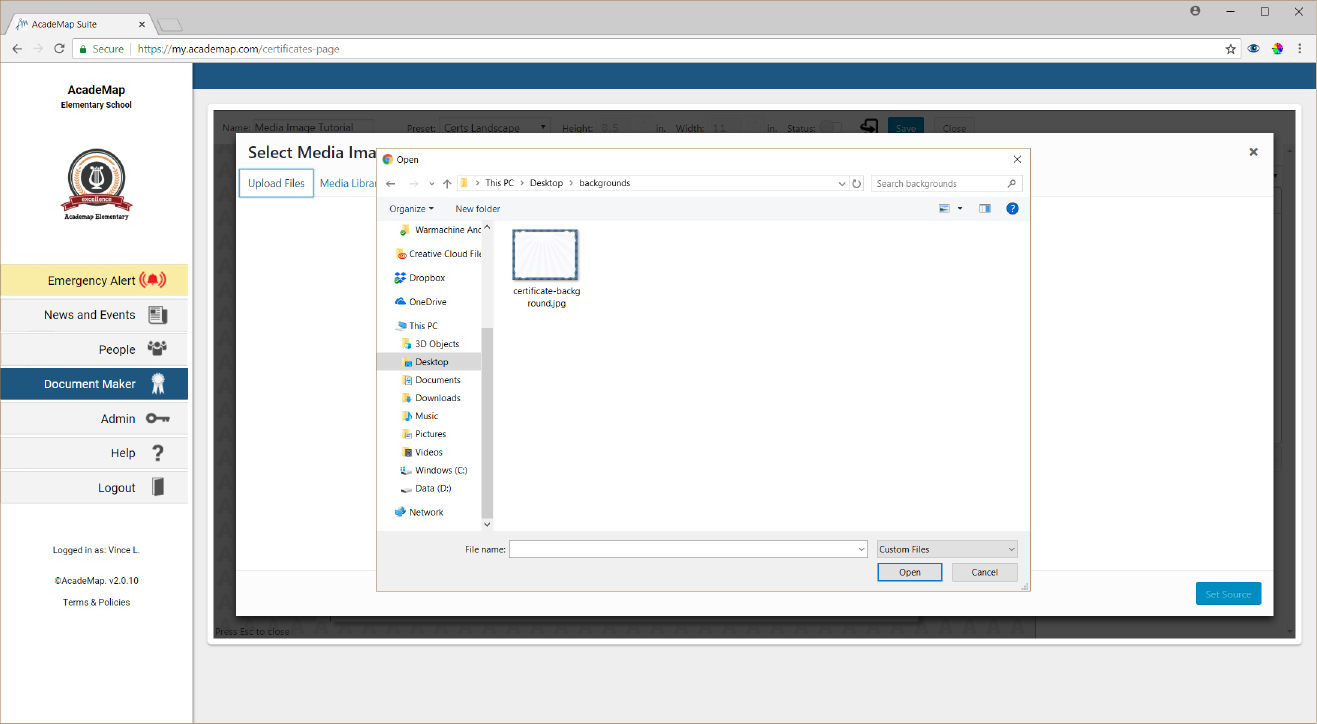
Clicking ‘Uploading File’ will prompt you to select the file from your computer. Select your file and click ‘Open’ to upload that file.
This will return you to the gallery with your new image selected. Click ‘Set Source’ to place that image in your document.
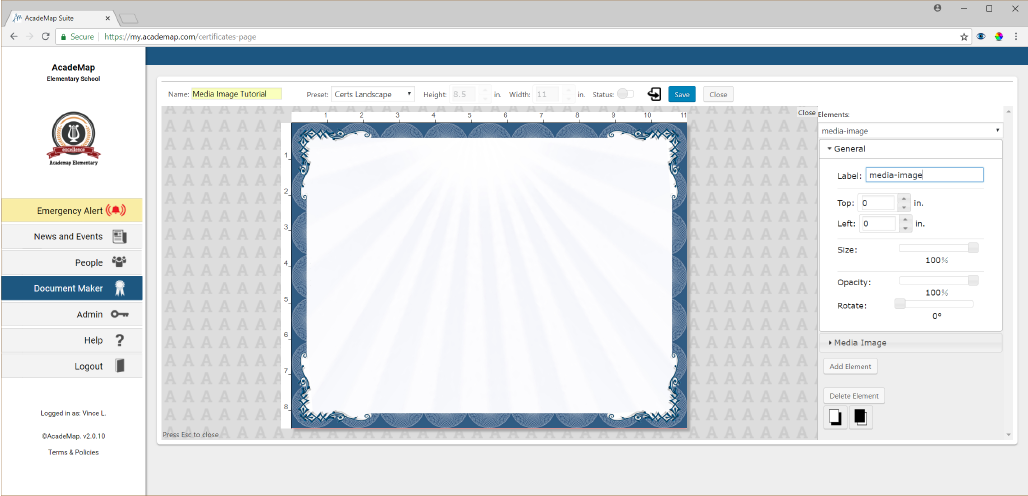
The image will now appear in your document.
To resize the image, use the ‘Size’ slider in the general settings tab.
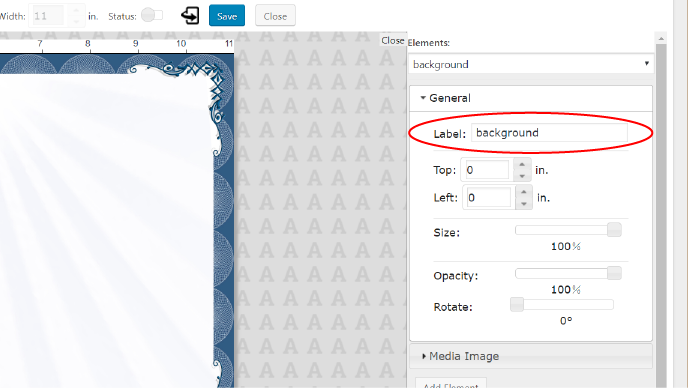
Most documents contain multiple media images– be sure to properly label your media image so it is easy to identify in your elements list.
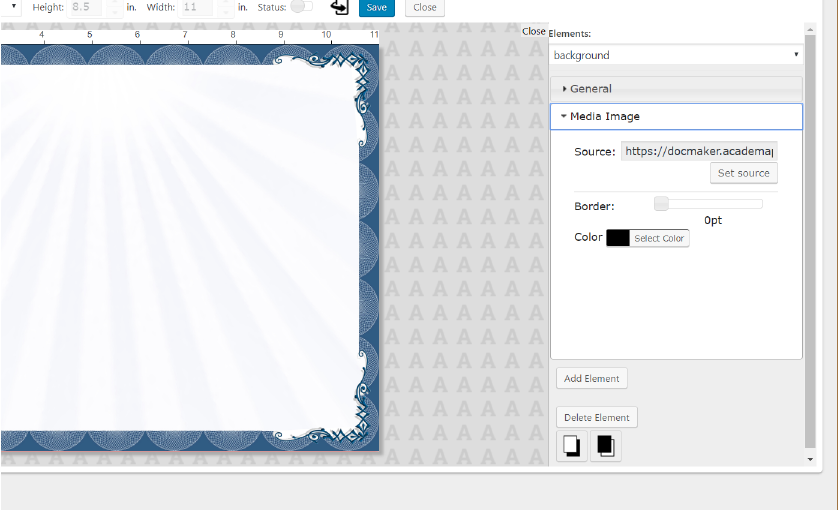
Click the ‘Media Image’ tab to add a border or change the image for this element.